Sunday, August 28, 2011

Bumble Bee Baby Shower

A dear friend of mine needed a theme for gender neutral baby, and the shower open house had to be done on a budget! We brain stormed until we found one the Mommy liked-- Bumblebees! The meal was being catered with all products provided, and the shower was being thrown in a brand new facility. The hosts decided to take advantage of the new neutral tables, and not use table coverings. I think it looks great and makes it a lighter feel for the baby shower!


Cake Table (The cakes were polka dot, opposite of the napkins)

Cake made my a family member--- Is it not ADORABLE!?!?

Fresh daisies in already-owned canning jars

Canning jar with rocks, ribbon and wood accent found at a craft store

The whole room- the potted plants were prizes (dual purpose = money saver)

Treat box- 12 boxes for $1 from Dollar Tree with stickers from Teacher's Aide
Boxes were filled with yellow candy to match the theme

Canning jar, black rocks, ribbon, wood accents on skinny dowel rods,
tissue paper pom on large dowel rod, scrapbook paper and daisy paper sprinkle


Entry Table


(First name removed and location blurred for security)


I don't have a picture, but the hosts displayed lemonade in an extra large mason jar and a laddle.


 Overall, we stayed on budget, got all the shopping done in one trip, and had fun while planning! I hope this inspires you to use things you already own to create an adorable shower!


Some other ideas we didnt use were:
- Hanging tissue paper poms/lanterns from the ceiling. This couldn't be done due to facility rules.
- Using large bumble bee balloons or hive decorations. The host wanted the theme to be subtle.
- Using themed plates/cups/napkins. The caterer provided these products, so the host didn't have any say.
- Polka dotted table coverings. The hosts decided to keep the neutral colored tables bare.

Hosting a shower? Don't miss the game ideas or planning tips!

Tuesday, July 12, 2011

Party Planning--- A baby shower!

Trying to plan a baby shower on a budget?? Here are a few things that might help!

1) Buy a little at a time. Instead of buying everything for the shower at once, buy a few things every time you go to the store. It will be much easier on the pocket book if you spent $5-$10 every week instead of $100-$200 at once! Buy things that will keep well and store them in a safe place! I would suggest designated a box, tote, or closet to being the collection place for all the items you collect.
2) Purchase items at discount stores. All your party supplies don't need to be purchased at a party supply store. Try dollar stores, dollar sections, Wal-Mart, Big Lots, etc. They have great deals! You can purchase things such as streamers, balloons, table cloths, basket fill, place settings, and more and save a big hunk of change! You will definitely want to check the durability and quality of some of these--- you don't want Aunt Betty trying to eat cake with a broken fork!

3) Plan early. Decide on a theme early in the game and plan quickly. This will allow more time to buy in advance and to shop for good deals! For example, if the baby shower will be in the middle of the year or later and you know you're hosting a bunny or duck themed shower, you can take advance of Easter deals for some decor or favors.

4) Use games as part of your gift. If you're playing a memory or pricing game, use the items to memorize or guess the price of as part of the gift you're giving the mom-to-be. Use a game that incorporates baby bottles to start off the mom's needed supply.

5) Utilize some of the decorations as the gift, also. You can hang a clothesline full of baby clothes, display clothes as a centerpiece, decorate with stuffed animals/books, fill baby bottles with tissue paper or candies, and more. Get creative! Centerpieces definitely make the atmosphere of the room, but you can still save money on them!

6) Add some pizazz to your table by placing a piece of colorful scrapbook paper that corresponds with your themes/colors at each place setting. It's cheaper than place mats and can be tossed after the shower. Also, shop for cheap material (by the yard or in the scrap bins) that matches or coordinates with your colors or theme and can be used to spruse up your tables!

7) Design your own invitations (and other necessary paper necessities) Design companies can charge as much as $4 for an invitation, so they can become a big part of your budget. Take a few hours to learn a design program such as Photoshop or something as simple as Microsoft Picture It! Premium (found on most Dell computers). Then look around online for an inspiration of what you want your invite to look like, decide on a size, create a design, buy some cardstock and envelopes (found at an office supply store) and you're ready to go!

8) Make your own food! Some caterers will charge $5 or more a person for a shower's meal--- and most budgets won't allow for that! Make ham salad/egg salad sandwiches, serve veggies & fruits, chip and dips, cheese ball and crackers, etc. Of course a cute baby shower idea is to serve a themed meal-- all the same color, baby themed or baby sized.

9) Use the theme of the nursery as the theme of the shower. Then ask the mom if she has already purchased decorations that can be used to help decorate the shower.

10) Make your own cake-- or cupcakes! A bundle of cupcakes can be dressed up by placing them in a shape that correlates with the shower--- a fish, a monkey head, a baby's rattle, a duck, a teddy bear, flowers, etc. You can also decorate each cupcake with a matching flower, baby item...or just leave them plain and display them on a fancy platter or tiered server.

11) Host the shower from your home or privately owned facility instead of renting a hall or banquet room. Of course, the area will need to be large enough for your guest list and have a flow that will work for a party of this nature.
Happy Planning!

Alternative Guest Book Ideas

Guests write advice/wedding wishes and on cards and drop in a tall vase.  These messages will be organized into a scrapbook after the wedding

A photobooth-- (rented or faux with a hired helper) print 2 copies- one that they get to keep (favor!) and the other one they glue onto a scrapbook page and write well wishes around it. Provide props.

A quilt--- each guest gets a patch to sign and leave their well wishes on 


Guests sign a big plate that will be displayed at the bride and groom's home

A digital guestbook-- have two people take digital photos of my guests as they walk in. Guest will write something on a postcard type paper and after the wedding, the postcards can be scanned in and added to the photos to be compiled onto a digital photo frame.

Have guests sign a personalized bat or sports jersey for a sport's themed wedding.

Guests sign a mat board around a picture of the bride and groom


A custom photobook--- leave spaces in the picture layouts for people to sign the book. Check your local photo lab or companies like Shutterfly.


An old fashioned typewriter with strips of paper for guests to type their name and well wishes on.

Have five wine bottles (labeled 1-5) and silver sharpies for the guests to write on the bottles. The bride and groom will have wine to help celebrate their first five anniversaries.

A time capsule--- guests write down messages for the couple's 1 year, 5 year, and 10 year anniversary. The bride and groom seal them away in designated containers and open them on the appropriate anniversaries.

A large piece of wood that guests sign and can be made into a bench, mantle, or wall hanging.

Rollodex--- Guests fill out their own address and information card to be filed into a rollodex.

Ceramic vase, bowl, platter, tray, etc with markers for guests to sign.


*These photos were collected over a span of time without marking their original locations. I apologize!


**Edited to Add:

Source

Looking for other alternatives to make your wedding more personal? Check out Alternative Ring Bearer Pillow Ideas.

Skim through all our wedding ideas, and don't forget to refer to the checklist.

Wedding Photographers

I found this article shortly after our wedding (I apologize-- I didn't mark where I found it) and fell in love with it. My husband and I spent nearly a year looking for a pair of wedding photographers that we loved-- personally, financially, and artistically.

Reasons why you should love your wedding photographer:
  1. Even though they have to carry around heavy bags of multiple cameras, they will keep on smiling throughout the day.
  2. While they have to be uber creative, they have to really be good with people too!
  3. They get a lot of work done under tremendous time pressure. Client-created-timelines sometimes aren’t as accurate as they should be (1 hour allotted for pictures after the wedding but there are at least 50 important family pictures to take). There just isn’t enough time for a human being to get all those shots!
  4. They have to work around your guest-amateur photo-enthusiast Aunt Martha that stands behind them with her camera taking their posed shots (did you know the flashes on her camera makes their large professional flashes go off)? This makes the portrait photos sessions go longer!
  5. Rarely getting to eat except a quick bite, they are on their feet so they won’t miss an important shot.
  6. Mindful of your family, they work quicker when your grandmother and grandfather are standing for shots.
  7. Somehow they are able to get your ceremony pictures even though your wedding Officiant does not allow flash photography during your service.
  8. A professional photographer’s mind will always be working to setup creative shots, even if it requires them to visit the ceremony site they’ve never worked in.

All of these are reasons that we are so happy we picked Carignan Gallery for our wedding photographers! They were a pleasure to work with and would hire them again in a second!

Wedding Checklist

While planning a wedding in southern Indiana, I found that many of the checklists for brides were not applicable for our wedding. For example, some included rented china and parking director that we did not need, but did not include keep and toss garters which I did need. Also, there were some decisions that we had to make that we hadn't thought about, such as what style of tuxedo pant and jacket.

Shortly after our wedding, I compiled all of my lists from the wedding ;planning process into one list to help future brides planning a small town wedding.

- Application for marriage license and name change form (provided at
   court house in county of bride or groom’s current residence)
- Minister and church
- Reception hall
- Dinner- pick meal, types of dishes/utensils, head count, extra plates for bride and  
     groom to take
- Bartender, liquor/alcohol, liquor license, bartender fee
- DJ
-Songs: Father/Daughter, Mother/Son, First Dance, Bridal Party
entrance, Cake cutting, Dinner Music, Anniversary Dance, Dollar
Dance, Bouquet Toss, Garter Toss
- Photographer- make a list of desired photos
- Dress
            - Alterations
- Crinoline
- Shoes- ceremony and reception
- Strapless bra
- Hair accessory (tiara, headband, flower)
- Jewelry- rings, necklaces, bracelets
- Dresses- Bridesmaids, flower girls, Mothers, Grandmothers
- Tuxedos- Groom, Groomsmen, Ushers, Ring Bearers, Fathers
- Colors and style of vest, tie, shirt
- Style of Tuxedo- 2 button, 3 button, tails, etc.
- Type of Shoe
- Ring pillow, Flower girl basket
- Stationary
- Invites (color, style, design), Save the Dates, Maps, Reception cards,     
        RSVPs, Menus, Programs, Itinerary for guests and/or bridal party, reserved 
        seating signs for reception tables
- Flowers-
- Bouquets (bridal, toss, bridesmaids), boutonnières (groom,
groomsmen, ushers, fathers, ring bearers), corsages (mothers,
grandmothers, attendants of guest book, bubbles, cake, etc.)         
           memorial, accents on dresses or in hair, guest book table
- Garters (1 to keep, 1 to toss)
- Hair style for self and bridesmaids
- Wedding night accommodations
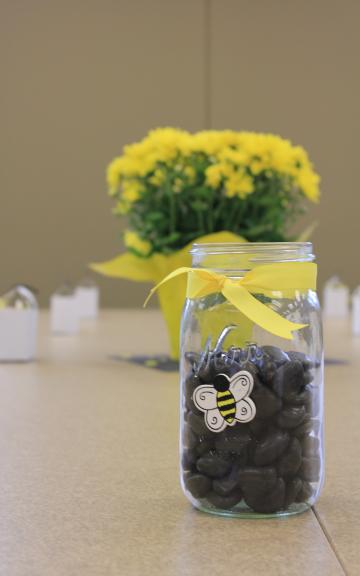
- Reception décor
- Centerpieces for guest tables, head table/s
- Table linens
- Chair covers/sashes
- Backdrop
- Entry Way
- Special sized/shaped tables if your reception hall doesn't have them (cake,  
  sweetheart, guest book tables)
- Window covers
- Door décor
- Food, drink, cake, candy, & gift table décor/centerpieces
- Décor around the room—trees, columns, lights
- Cake design, flavors of each layer of cake, and cake stand
- Cake topper
- Card Box
- Cake server
- Guest favors
- Videographer
- Veil
- Make-up/nails—eye brow wax, highlights, haircut
- Bubbles, Birdseed, confetti, rose petals, etc
- Vows- traditional or personalized
- Limo/transportation/Get-a-way car
- Guest book and pen
- Toasting glasses for couple and/or bridal party
- Bridal party gifts (bridesmaids, groomsmen, flower girls, ring bearers,
   ushers, any and all assistants—bubbles, programs, readers, singers,
   pianists, etc.)
- Gifts for parents/grandparents
- Gifts/Cards for each other at rehearsal or wedding day
- Unity candle and stand or sand ceremony with vases
- Paper Goods/Dishes
- Cups (for dinner, bar, punch)
- Napkins (dinner and cake)
- Plates (dinner, appetizers, and cake)
- Forks (dinner, appetizers and cake)
- Ceremony décor-
o       Pews, altar table, candelabras, doors, aisle runner, windows
- Ceremony Music- Interlude, seating of mothers, bridal party entrance,
    processional, unity candle, recessional
- Announcements in newspapers
- Guest list for wedding, bach. parties, and shower
- Rehearsal dinner- location, guests, decorations, dinner
- Collect addresses
- Clothing
o       Rehearsal and dinner, intimate apparel, honeymoon clothing
- Candy buffet- types of candy, containers for guests to fill (sacks, boxes, 
     buckets), containers for display
- Something old, new, borrowed, blue
- Signs between ceremony and reception, as well as directions (and someone to put up signs)
- Appetizers
- Memorial candle
- Personalized attire for self or attendants
- Containers for left over food and cake to be taken home after reception
- Stamps for invitations and thank yous
- Emergency kit for wedding day
- Bathroom amenities kit for reception
- Mints & nuts with serving containers for cake table
- Baskets/Containers for bubbles and programs
- Prescriptions of medicine and/or birth control 


To Buy:

Marriage License
Crinoline
Shoes
Strapless Bra
Hair Accessory
Jewelry
Dress
Ring Pillow
Flower Girl Basket/s
Favors
Garters
Flowers
Cake Topper
Card Box
Aisle Runner
Veil
Bubbles/Birdseed/Confetti/Petals
Guest Book and Pen
Toasting Glasses
Paper Goods- Plates, Napkins, Forks, Cups--- for cake, appetizers, dinner
Unity Candle or Sand Ceremony
Memorial Candle
Stamps
Candy
Clothing-- Rehearsal and dinner, intimate apparel for you and him, honeymoon
Nuts, Mints, and containers for the cake table

Party Checklist and Timeline

Party Planning Timeline

One Month Before:

1. Choose a theme for your party. Party themes make the party much more fun!
2. Create a guest list for your party. Pick the party date, location and start time.
3. Order or buy party supplies and decorations. I suggest shopping around for the best deals and always check dollar bins and Dollar Tree before you pay higher prices elsewhere.

2-3 Weeks Before:
1. Send out the invitations. Ask for regrets.
2. Plan your menu, activities and games that you plan to use.

1 Week Before:
1. Contact the guests that have not responded .
2. Order or bake your cake. If you are making your own, bake it ahead of time, wrap it in cling wrap and freeze it.
3. Make or bake other items that can be made Before hand. This is a big time saver and should be done if possible. Store foods in the freezer.

2-3 Days Before:
1. Buy any remaining food or supplies for the party.
2. Check batteries for the camera or the camcorder.
3. Take out any food you have made ahead of time from the freezer. This allows sufficient time for the food to defrost in the refrigerator.

1 Day Before:
1. Finalize the cake. Either decorate it if you made it or pick it up if you ordered it.
2. Complete all food.
3. Child-proof the area so the party is safe for little ones.
4. Decorate any indoor areas.
5. Prepare any food and beverages that can be prepared the day before.

The Big Day:
1. Decorate any outdoor areas. Do this early in the day, unless there is threat of rain or it is windy.
2. Prepare foods and beverages that could not be made ahead of time.
3. Decide where the gifts should go. If this is a birthday party, have a table or some designated area for the gifts.

Party Supply Checklist
Dinner and Dessert Plates
Dinner and Dessert Napkins
Cups
Table Cover
Plastic Cutlery
Invitations
Thank Yous
Drinks
Mylar/Latex Balloons
Cake
Candles and something to light them with
Food
All "meal" items-- think of all dishes and what you will need (spoons, bowls, platters, etc)
Snacks
Ice Cream
Bowls for ice cream
Games/Activities
Door Sign
Centerpieces
Party Extras/Favors
Camera/Film/Charged Batteries
Ice
Decorations- streamers, confetti, banners, tents, pennants, etc.
Signs directing guests (and someone to put them up)


Sunday, July 10, 2011

Tips for Planning Your Own Party

·        Give yourself plenty of time. I would allow at least 4-6 weeks to help keep the stress level down. This should allow enough to think through your thoughts and ideas, plan, and shop.  
·        Keep it personal! Don't just go to the store and pick up a pack of themed plates and cups. Think about what your loved one is interested in, enjoys and would be surprised by.
·        Use a checklist. Make a list of everythink you will need to buy or do and mark it off as you go.
·        Make a guest list. Before you plan, make a list of who, how many and what aged guests you will have. This needs to be taken into consideration before you plan activities, choose a location and order/buy food and favors.  
·        Ask for help. I'm guilty of wanting to complete everything myself, and I've learned from experience that it can't be done. It's too stressful and time consuming. Be honest with yourself that you can't be superwoman and ask friends and family for help. They may not complete a task they would have done, but at least it will get done. Assign jobs before, during and after the party. You'll be happy you did!
·        Be flexible! Always have a plan B and know that something is going to go wrong the day of the party.
·        Plan a few more games and activities than you expect to play. Things never seem to last as long as you think they will, so have a few extra things in mind to do with the kiddos incase there's extra time.
·        Decide on the menu pretty early in your party planning process and make a list of all of the food and drinks that you will need to purchase from the grocery store. Determine what type of serving dishes you are going to need and be sure you have everything. If there's something that you're missing, call a friend to see if you can borrow something, or add the item(s) to your shopping list.
·        Order a cake. Baking your own cake is a big job unless you've taken my advice and nominated friends and family to complete other tasks. Don't try anything really elaborate and if it's in the budget, buy a sheet cake. You can even ask around about buying a plain sheet cake that you can decorate yourself if you really want to.
·        Greeting guests at the door with a smile will help them feel comfortable right away. Decorating your party location to match your theme will spark your guests enthusiasm, and dressing in the style of your theme will get everyone talking.

·        Take lots of pictures! After going through the trouble of planning this monumental affair, you darn well want to have the pictures to document it! Not only will it be great fun to look back at them years from now, you can print some off and send them with the thank you notes as an added touch.
·        Don't forget the thank you notes! This is one of the most overlooked, but most important party planning tips. Thank you notes are plain common courtesy, and they also let the guests know that they were an important part of your event.
 Based off the ideas of: http://www.passion-for-parties.com/party-planning-tips.html

Tips for photographing your own party

Here are some tips to photograph your own party:


·       Ask someone at the party to take the pictures for you, if possible. So many parties get under way (or finished) before the host realizes that she didn't get any pictures of the cake, centerpieces, decorations, and so on. Don't let that be you!
·      Be cautious of backgrounds. Before you take a picture, make sure that there isn't anything in the background to mess it up. You don't want a wall hanging or artificial tree growing out of Uncle Bob's head.
·       Zoom in close on your subject. Wide angle pictures don't show the true emotion, detail and special touches you put into your party.
·       Get down to eye level of your subject.
·       Remember the still shots! Be sure to get many photos of the cake, the festive stack of gifts, and the detailed decorations.
·       Capture the action! Think of yourself as a "photojournalist." You want to 'tell the story' of the party, so take a sequence of photos during games, activities, gift opening, candle blowing, etc.
·       Get a good mix. Get some candid photos of the fun and excitement, but also ask guests to pause for a posed photo. Group photos are also a great idea, and guests feel more comfortable doing this if you have goofy props for them to interact with.
·        Make sure your batteries are charged before the party! I'm guilty of forgetting this one!

Cars Party

I had the absolute pleasure of getting to plan a Cars party for my nephew's second birthday. He had watched Lightning and Mater more times on DVD than we could count, so there was no question about the theme. His parents ended up renting a room to hold the party in because the guest list grew to about 60 people with such a big family and so many close friends.


Chocolate donuts = Casa Della Tires


Old license plates, free oil boxes and cheap signs made simple room decor
 
The kiddos made their own license plates and colored themed pictures for the birthday boy

The birthday boy had his own Cars place setting

Tables were decorated with road stripes (party streamer), cones (borrowed)  and race flags (cheap from the party supply store), as well as piston cups ($1 at Dollar Tree)

Guests enjoyed themed glasses for pictures ($2 for 8 at Wal-Mart)

Borrowed cones, flags and car supplies, free oil boxes, and a DIY speed limit sign made another simple room decor
 
The kiddos also had cars to play with on the road rug (already owned)
 
Rice Krispie treats and M&Ms made street lights  (Have you read my suggestion of not making your own cake?? This one is perfect example of all the things that can and will go wrong in the last day before a big party if you take on a task like making the cake...)
 
I found a scene setting that matched the theme on clearance for $7!
 I forgot to get pictures of the favors for the kiddos (another reason why I suggest asking or hiring someone to take photos), but each child got a lightning sack with Cars themed toys, a DIY candy bracelet with lightning, Cars fruit snacks and a gold "Piston Cup" made from silver trophies found at the Dollar Tree.)

Our Wedding

We got a photo with all of our guests after the wedding

I wanted a heart cake topper and found one in a bridal catalog like I wanted for $20....but ended up spending $2 on an identical one--- it was a cookie cutter


Because we had a summer wedding, it was still daylight for our reception, so we covered the windows to look real
Vase and Candle from the Dollar Tree, with the "In Loving Memory" cling purchased for $3 at JoAnn Fabrics

Bubbles bought as a leftover from a cousin's wedding

Pen was a replica of the one my late grandfather carried every day

Family heirloom that was hooked into my bouquet

My pink shoes

I wore my dad's work shirt to get my hair done...

Purchased in the dollar section of target and painted to match...

Made at home to match...

Made to match from cardboard and dollar store flowers

Bridesmaid dresses were made for each girl, costing $35 per person + the price of the material= ~$55 a piece

Omni sashes (table runners) tied on all candleabras and aisle candles